Lilshira


Everest Base Camp Trek for Beginners: What to Expect
Back to articles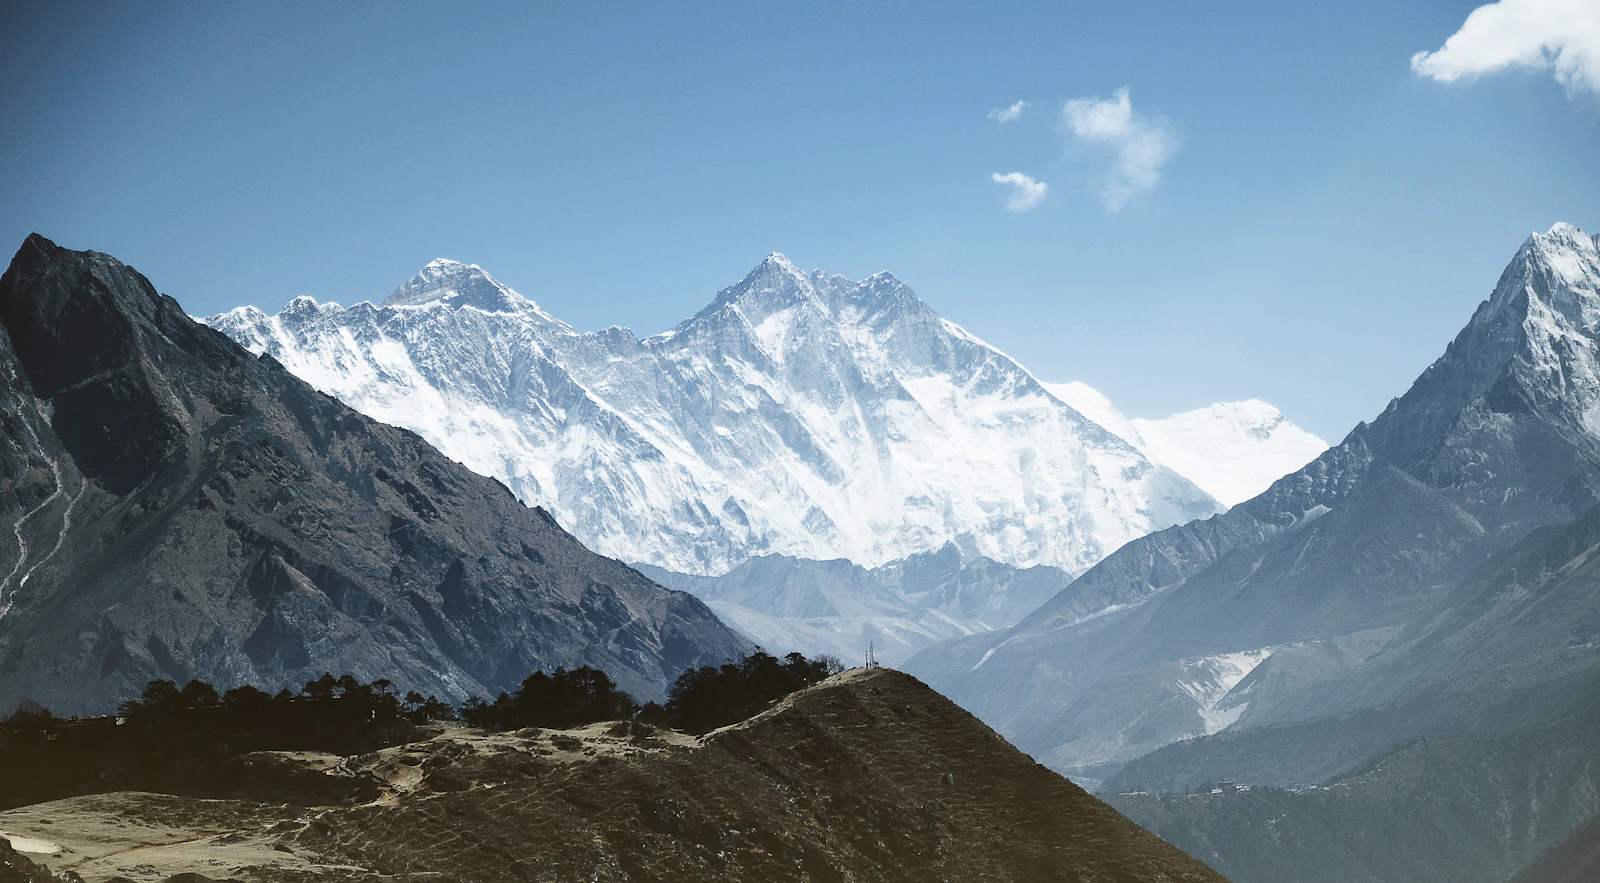
On this page
- Is the Everest Base Camp trek for beginners doable?
- How hard is the EBC trek in practice?
- How to prepare for EBC trek: a training timeline
- Acclimatization on the Everest Base Camp route
- The classic route to Everest Base Camp, village by village
- What a typical trekking day looks like
- Walking pace, habits and evening routines
- EBC trek altitude: what changes as you climb
- The best months for a first time Everest trek
- Permits, guides and logistics for a beginner
- What the EBC trek costs, by travel style
- How to read a trek operator's inclusion list
- Exclusions, changes of plan and written quotes
- Common beginner mistakes on the EBC trek
- Teahouse life, food and what to pack
- Frequently asked questions
The Everest Base Camp trek for beginners is achievable with guided support, a steady acclimatization plan and a few months of walking fitness. Nothing on the route needs ropes or climbing skill, so the deciding factor is not the terrain but how well your body handles altitude once the air thins.
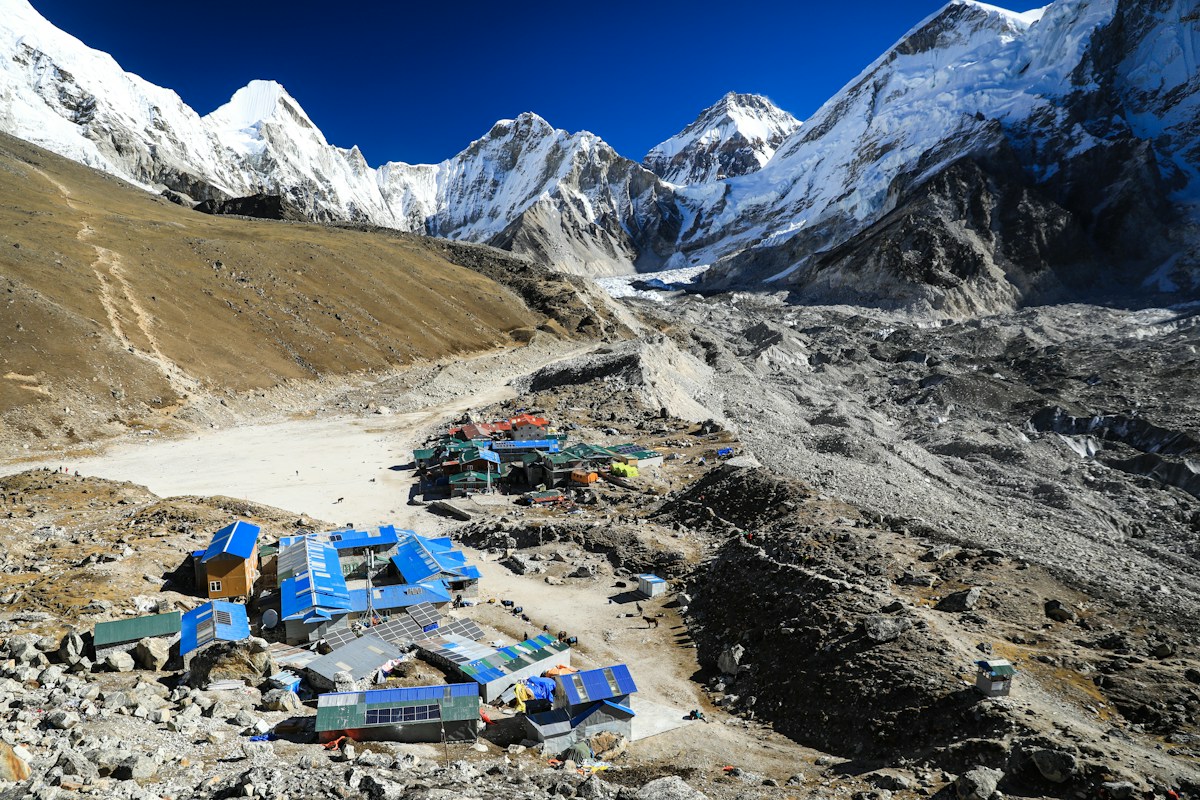
Is the Everest Base Camp trek for beginners doable?
For most reasonably active people the answer is yes. Is EBC trek suitable for beginners, or does it demand experience you do not have yet? Put simply, the route rewards patience more than fitness: it is walked at the pace your acclimatization allows, not the pace your legs would like.
Two habits separate the beginners who reach base camp from those who turn back, and both are about self-control. Trekkers who treat the first days as a warm-up and push hard towards Namche Bazaar tend to feel it much higher up. Those who walk slowly, drink steadily, eat even when appetite fades, and rest on schedule usually keep going without drama.
It also helps to know what the walk is not. There is no technical climbing, no ropes and no glacier travel on the standard route to base camp. The trail is a long, well-worn path between villages in the Khumbu, with a teahouse every few hours. What it lacks in technical difficulty it makes up for in length and height, and height is the part you cannot train for, only adapt to.
Suitability comes down to patience rather than age or gym fitness. A steady walker in their sixties and a first-time trekker in their twenties both finish when they allow enough days and heed the early signs of altitude. Any decent Everest Base Camp trek guide will tell you the same thing: on this route the mountain sets the schedule, not your training plan.
Mental preparation matters as much as the physical kind. The trek is long and repetitive, and the days that feel hardest are rarely the steepest ones. Beginners who decide in advance that they will not race other trekkers, and who treat a slow teahouse afternoon as part of the trip rather than lost time, tend to finish more comfortably than those who chase the schedule.
How hard is the EBC trek in practice?
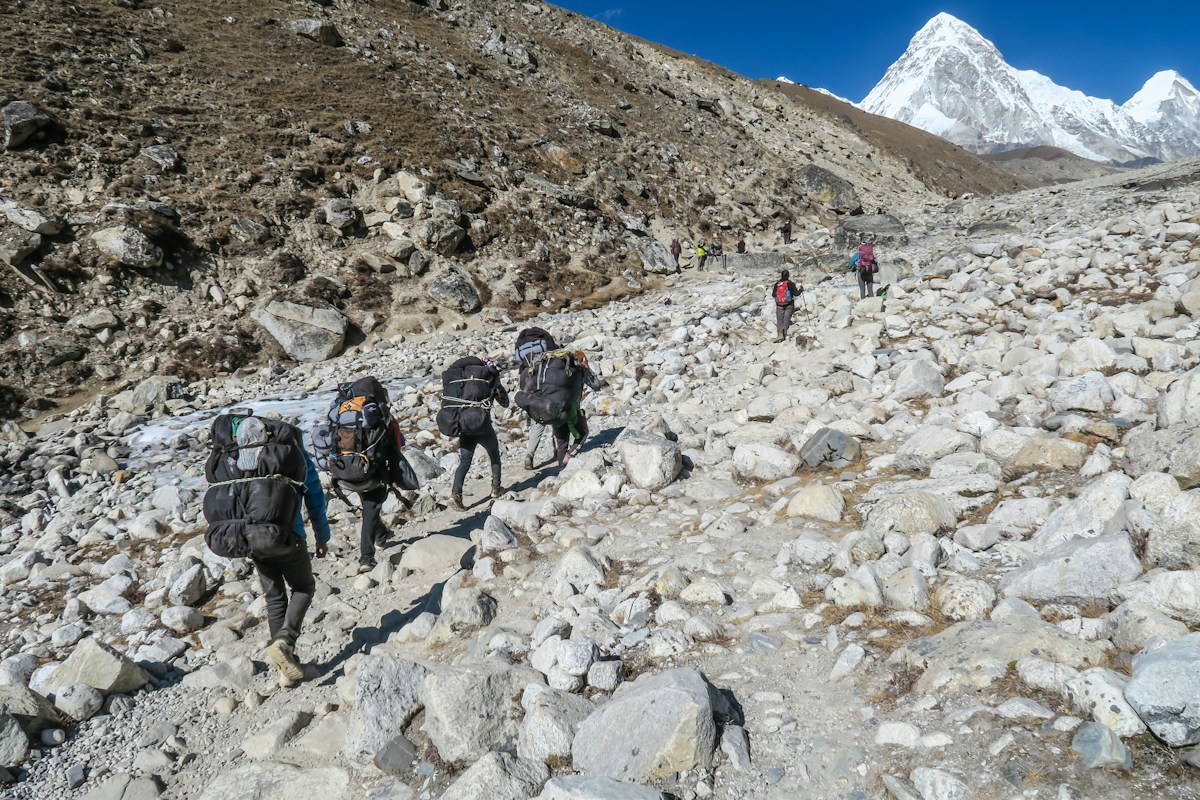
EBC trek difficulty is moderate and almost entirely non-technical; what makes it hard is the pairing of long daily stages with steadily rising altitude. If you can walk for several hours on hilly ground and recover overnight, the distance alone is manageable.
Break the challenge into its parts:
- Daily time on foot. Long days on foot, often five to seven hours, with a shorter stage built in every few days.
- Terrain. Stone staircases, suspension bridges, forest trails and open ridge paths. Steep in places, but never needing hands or equipment.
- Altitude. The route climbs from warm valleys into progressively thinner air. This is the factor that ends treks early.
- Routine. Cold mornings, simple food and shared rooms wear some people down as much as the walking does.
The order matters. Beginners usually handle the first two with ease and underestimate the last two, because altitude and routine are cumulative. Problems seldom appear on day one; they surface a few days in, above the tree line, when the body is already tired and the comforts of the lower valley are behind you.
A steady walking pace beats a fast start every time. Trekkers who reach each teahouse with energy left, rather than exhausted, are the ones who stay healthy once the air thins. If you find yourself breathing hard enough that you cannot hold a conversation, you are walking above your acclimatization, and the fix is to slow down, not to push on.
Distance and altitude rarely peak on the same day, and that is deliberate. The longest stages sit low in the valley, while the highest ones are short, so no single day asks for both at once. What catches beginners out is the reverse: a short high day that leaves them more tired than any long low one, because the air, not the mileage, is doing the work.
How to prepare for EBC trek: a training timeline
Begin twelve to sixteen weeks ahead and build gradually. Cramming fitness into the final fortnight adds strain without adding capacity; the aim is not peak speed but the ability to keep walking day after day with a light pack.
- Months three to four out. Walk or hike three times a week and build towards three-hour sessions on hills, with short strength work for legs and core.
- Two months out. Add one longer walk each week in a loaded daypack, wearing the boots and layers you intend to trek in.
- One month out. Practise back-to-back walking days at the weekend, using the same rhythm of meals, water and rest you will use on the trail.
- Final fortnight. Taper. Walk to stay loose, sleep well, and stop testing new gear, new boots or new distances.
Sort your kit early as well. The most common beginner mistake is arriving in Kathmandu with untested boots and a bag that has never been carried for six hours. A guided Everest Base Camp trek removes some of the planning, but it cannot carry your fitness or break in your boots for you.
Training on hills matters more than training for speed. Treadmills build the heart; uneven ground builds the ankles, knees and balance that this trail actually asks for. If you live somewhere flat, stairs and stadium ramps are a reasonable substitute, repeated until the legs stop noticing them.
Strength and balance work pays off more than long runs. A couple of short sessions a week for legs, hips and core reduce the strain of a loaded pack on rough ground, and recovery after each day becomes noticeably easier. Sleep is part of training too: no week of walking builds fitness that a run of short nights will not quietly undo.
Acclimatization on the Everest Base Camp route
Everest base camp acclimatization is the most important skill a beginner can build, and it is mostly about going slower than your legs want. The body adapts to thinner air over days, not hours, and no level of fitness compresses that timeline.
Most itineraries build in rest days on the climb: one early, usually at Namche Bazaar, and one higher up around Dingboche, where the valley opens and the serious altitude begins. A rest day is not a day off. It is a short, gentle climb followed by a return to sleep lower down, the pattern trekkers call climb high, sleep low.
Keep these rules in order of importance:
- Gain height slowly, and take every rest day even when you feel strong.
- Drink steadily and keep eating, even without appetite.
- Never sleep at a height that made you unwell the day before.
- Treat a headache, nausea or breathlessness at rest as a stop signal, not something to walk off.
The decisive move is downward. If symptoms worsen, descending to a lower village resolves most altitude problems quickly, and it is always the better call than pushing on to base camp. Pheriche, lower than the villages above it, is often used as the sleeping point that lets trekkers recover and rejoin the route a day later.
Two things make altitude harder than it needs to be. Dehydration and going to bed already exhausted both slow the body's adjustment, so steady fluids and a relaxed afternoon are practical tools rather than luxuries. Alcohol is best avoided at height altogether, since it disturbs sleep exactly when sound sleep is doing the real work of adaptation.
The classic route to Everest Base Camp, village by village
This route climbs the Khumbu valley in a steady stair-step, each village a little higher than the last. Plan on twelve to fourteen days from Kathmandu for a first attempt, flying in to Lukla at the start and out again at the end.
- Lukla to Phakding. A short, gentle first day that sets the tone: walk slowly now and thank yourself later.
- Phakding to Namche Bazaar. The first real climb, over suspension bridges, into the trading town most trekkers use as their first rest stop.
- Namche Bazaar to Tengboche. A shorter day to the monastery village, with the first close views of the high peaks.
- Tengboche to Dingboche. The trail leaves the forest and the views open out; this is where altitude starts to make itself felt.
- Dingboche to Lobuche. A steady climb past the Pheriche turn-off, with a rest day usually taken just before it.
- Lobuche to Gorak Shep, then Everest Base Camp. The final, hardest day, and the reason for the whole walk.
From Kathmandu the trip usually begins and ends with a buffer day, because flights to Lukla are weather-dependent and delays are normal rather than exceptional. Add that buffer at both ends rather than trimming the acclimatization days in the middle, which are the ones doing the real work.
The same route runs in reverse as the descent, and that is deliberate: coming down is faster and easier, and it gives the body a second chance to adjust on the way up if a day was cut short.
The route is shaped so that the hardest walking comes late. Villages sit close enough together that a bad day can usually be shortened, and the steepest ground arrives after the body has had time to adjust. That is why a first attempt is better served by the classic line than by a shortcut between valleys.
What a typical trekking day looks like
A trekking day is shaped by light, weather and altitude rather than by a clock. Mornings start early and cold, because the clearest views and the steadiest walking come before the afternoon cloud builds. Bags are packed before breakfast, breakfast is eaten in the dining room with everyone else, and the walking begins once the first climb has warmed you through.
The middle of the day belongs to walking. The pace stays conversational, with short stops to shed a layer, drink and let a porter train pass. A longer break comes around midday, usually at a teahouse where lunch is cooked to order, and the afternoon stage is often the shorter of the two on high days. Arrival at the next lodge comes early enough to claim a room, wash and rest before dinner.
Distance on the map matters less than the time it takes. A short stage with a long climb can fill a morning, while an easy valley walk covers more ground before lunch. Judge the day by hours on your feet and by how high you sleep, not by kilometres. Planning around the weather rather than the clock also saves afternoons that would otherwise be spent walking into cloud. The same is true of the afternoon: a stage that looks short on paper can take as long as a valley walk, because the air, not the ground, sets the pace.
Walking pace, habits and evening routines
Small habits make the day easier:
- Pack before breakfast rather than after it, so the morning is not lost to sorting.
- Drink at every stop instead of in one long gulp at the end.
- Eat lunch even when altitude has dulled your appetite.
- Use the afternoon for rest, not for a second walk that leaves you tired at bedtime.
Evenings are short and practical. Dinner is served early, the dining room fills, and most people are asleep not long after dark. That is not idleness. Sleep is when the body adjusts, and a late night costs more at height than it would at home. A headlamp, a warm layer kept dry and a bottle of water by the bed make the night simpler.
By the second week the day can feel repetitive, and that is the point. A rhythm you stop thinking about leaves attention for the things that matter: how you feel, how your breathing sounds, and whether the person beside you is struggling. Beginners who settle into the routine early tend to enjoy the trek more and finish it in better shape. The routine also makes a group easier to travel with, since everyone eats, walks and rests at roughly the same pace, and the days begin to blur in a way that makes the arrival feel earned.
EBC trek altitude: what changes as you climb
Height is the figure that shapes every other decision on the route, from how far you walk in a day to how many rest days you build in. Height is not a single obstacle but a series of thresholds, and each one asks something new of your body.
Read the route as a climb through bands rather than a list of stops:
- Low valleys, near the trailhead. Warm, green and easy; this band lulls beginners into overconfidence.
- Namche Bazaar and below. The first place many people notice mild altitude effects.
- Tengboche and Dingboche. Above the tree line, colder, with thinner air and a slower pace for everyone.
- Lobuche, Gorak Shep and base camp. The highest villages on the route, where the body works hard simply to rest.
In the upper band the routine changes. Distances shorten, rest days become non-negotiable, and awareness of symptoms matters more than the map. This is the band where guided support earns its place, because a guide watches for changes you may not notice in yourself.
The clearest sign that altitude is winning is not breathlessness on a climb, which is normal, but breathlessness at rest, or a headache that will not shift. Neither settles by waiting at the same height, so both are signals to stop gaining height and let a guide or a doctor judge what comes next.
Height also changes the familiar signals of effort. A pace that felt easy lower down feels like work higher up, and the same walk simply takes longer for everyone, fit or not. Beginners who accept the slower rhythm on the high days find the route far kinder than those who try to hold their valley pace all the way to base camp.
The best months for a first time Everest trek
Two seasons carry a first attempt: the windows either side of the summer monsoon are the seasons to plan around. Spring and autumn give the steadiest conditions and the clearest views of the high peaks; the other two seasons trade comfort or certainty for quieter trails.
- March to May (spring). Warming days and lengthening light, with good conditions on the trail; haze can build before the rain arrives.
- September to November (autumn). Usually the clearest skies and most settled weather, and the busiest months as a result.
- December to February (winter). Cold, quiet and cheapest, but high passes can close with snow and some teahouses shut.
- June to August (monsoon). Wet, cloudy and prone to delayed flights; the least reliable of the four for a first attempt.
Two small adjustments help beginners. Aim for the shoulder of a prime month rather than its heart if you want quieter lodges, and build in spare days for the Lukla flight at any time of year, since mountain weather can ground it without warning. Trekkers who add a short warm-up hike near Pokhara often arrive at the trailhead more relaxed about altitude and routine.
Season choice also decides how much of the trip is about the mountains and how much is about logistics. In the settled months the Lukla flights run more often and the days are more predictable; in the margins you trade some of that certainty for space and lower prices. For a first trek, predictability is usually worth more than an empty trail, because a missed flight can cost a rest day you would rather keep.
Permits, guides and logistics for a beginner
Paperwork does not have to be arranged alone, but it pays to know what is required. Most treks need two permits: an entry permit for Sagarmatha National Park and a local municipality permit for the Khumbu. Guides are compulsory for foreign trekkers on this route, so the paperwork usually comes bundled with a guided trip.
Logistics worth sorting before you fly:
- Travel insurance that explicitly covers high-altitude trekking and helicopter evacuation.
- A buffer day in Kathmandu at the start, so a delayed mountain flight does not eat the trek.
- Cash for the trail, since card payment above Namche Bazaar is unreliable.
- Copies of your passport and permits, kept separately from the originals.
Rules and advice for entering Nepal, along with health and safety notes, do change. The current guidance by passport is kept on the UK travel advice, the quickest place to confirm what applies to you before booking.
Finally, read the insurance small print. Many standard policies exclude trekking above a certain height unless you buy an add-on, and evacuation cover is the part that matters most on this route. Check the altitude limit and the evacuation clause before you pay, not after.
Permits are checked at points along the route, so carry them yourself rather than leaving them in a bag sent ahead with a porter, and keep them dry. High on the trail a soaked permit is easy to lose and awkward to replace. It also pays to know what the permit covers: park entry and the local fee are separate from the guide's services, so a package quote should list both openly.
What the EBC trek costs, by travel style
Budget for an EBC trek for first timers comes down to how much you want arranged for you. Costs move with season, group size and what is bundled, so read these as relative bands rather than fixed figures.
- Budget and self-organised. You pay for permits, teahouse nights and meals as you go. Cheapest on paper, but every delay and every reroute becomes yours to solve.
- Mid-range guided group. A fixed package with a guide, porter support, permits and most meals bundled, the shape most Nepal trekking tours take. The usual choice for a first trek, and the easiest to budget for.
- Premium and private. Smaller groups, more comfort and more flexibility, with private departures and better rooms. Highest cost, least friction.
Whichever route you take, several costs sit outside the headline price: the flight to Lukla, insurance, tips for guide and porter, and any gear you rent. A cheap headline often excludes the very things a beginner needs most, such as evacuation cover or a second guide, so it is worth pricing the whole trip rather than the sticker.
The single biggest variable is the season. The same trip costs noticeably less in the quieter months and at the very edges of the prime windows, when lodges are emptier and operators are keener to fill dates. Travelling in a slightly smaller group also spreads the fixed cost of a guide and porter across fewer people, which is worth weighing against the privacy a private departure buys.
How to read a trek operator's inclusion list
Trek quotes are only as useful as the list that comes with them, and that list is where beginners lose the most money. Two packages can look identical in a photograph and differ entirely in what happens when a flight is cancelled or a walker needs to come down. The cheapest-looking quote is rarely the cheapest trip. Read the inclusions line by line and ask what each one actually covers. Ask for the same list from two operators and the differences appear at once.
Start with the items that are easy to assume:
- Permits. Both the national park entry and the local fee should be named, not folded into an unexplained total.
- Guide and porter support. Ask how many trekkers each guide accompanies, and what a porter will and will not carry.
- Domestic flights. Confirm whether the Lukla flight is included and what the operator does when weather grounds it.
- Meals and lodging. Find out which meals are covered and whether a private room costs extra.
- Spare days. Check whether the itinerary has room to move, or whether every stage is fixed.
Exclusions, changes of plan and written quotes
Then read the exclusions, which matter more. A list that names what is not included is more honest than one that stays silent. Look for tips, drinks, hot showers, charging and rented gear, because these small items add up over a long trek and are the usual reason a budget drifts. Ask for the total in writing with the exclusions placed beside the inclusions, so the two lists can be read together.
Ask how the operator handles a change of plan. Weather, illness and closed trails all force reroutes, and the answer tells you whether the trip is run with slack or with a schedule that cannot absorb a bad day. A guided trek should also say who makes the call to descend and how evacuation is arranged.
Finally, prefer a quote that is written down. A spoken promise about permits or flights is hard to rely on at altitude, while a line in the itinerary can be checked before you pay. The operator's own list is where the details live, so ask for it in writing and keep it with your documents. A clear list is also the easiest way to see whether the trip is run for walkers or for a schedule.
Common beginner mistakes on the EBC trek
The most common beginner mistakes on the EBC trek come down to pace, rest and preparation rather than fitness, and most of them are avoidable. Skipping an acclimatisation day, walking too fast above Namche Bazaar, treating the itinerary as fixed and packing more than a porter should are the errors that end treks early.
The costliest is skipping an acclimatisation day. Those days let the body catch up with the height, and trading one for a faster schedule usually costs more than it saves. Just behind it comes walking too fast above Namche Bazaar, before the thinner air has had its effect, when it is easy to feel strong.
A few smaller mistakes add up over a long trek:
- Drinking too little water. Thirst is a poor guide at altitude, so sipping at every stop beats one large drink at the end.
- Treating the itinerary as fixed. Weather, illness and closed trails force changes, and a plan that cannot absorb a bad day will break.
- Packing a bag too heavy for the porters' limit. Anything above the agreed weight is weight you carry, and the altitude, not the mileage, is what tires you.
- Ignoring the operator's exclusion list. Tips, drinks, hot showers, charging and rented gear are the usual reasons a budget drifts.
Two assumptions also catch beginners out. Not every teahouse has reliable power or hot water, so a charged power bank and a little cash in low denominations matter more than they would at home. And a rest day is not a day off: it usually means a short, gentle climb and a return to sleep lower down. Beginners who accept the slower rhythm reach base camp far more comfortably than those who try to hold their valley pace all the way up.
Teahouse life, food and what to pack
Most of the trek is spent in teahouses: simple, family-run lodges that serve as bedroom, dining room and kitchen all at once. The Sherpa families who run them set the rhythm of the day, and the dining room, warmed by a stove, is where trekkers eat, compare notes and rest.
Food is plain and filling rather than fancy. Expect rice and lentil soup, noodles, potatoes, eggs and bread, with tea on constant offer. Two habits keep beginners well at height: drink more water than feels necessary, and choose cooked food over raw.
Pack for layering, not for a single climate:
- Feet first. Broken-in waterproof boots, thick socks and a spare pair kept dry.
- Layers. A warm base layer, an insulating mid layer and a windproof, waterproof outer shell.
- Sleeping. A four-season sleeping bag, since teahouse blankets at height are basic.
- Day-to-day. A headlamp, water bottles, sun protection, a small first aid kit and any personal medication.
Rent the big-ticket items in Kathmandu if you will not use them again, and buy the boots at home where you can walk them in. Everything else is lighter than people expect; the altitude, not the weight, is what tires you.
Two more habits make teahouse life easier. Carry a small amount of cash in low denominations for snacks and hot drinks, and keep one set of dry clothes reserved for the evening so the day's walking kit can dry overnight. Small comforts like these matter far more at altitude than they would at home, where a wet shirt is a minor annoyance rather than the start of a cold night.
Frequently asked questions
Can a complete beginner with no trekking experience do the Everest Base Camp trek?
Yes, provided the route is walked slowly and the rest days are respected. Experience helps with pacing and packing, but the trek is non-technical, and many first-timers who prepare for a few months and follow a guided itinerary reach base camp. The main risk is altitude, and that is managed by time rather than by experience.
Do I need to be extremely fit to trek to Everest Base Camp?
No. You need general fitness and the patience to walk five to seven hours on consecutive days. If you can manage long hill walks without distress, you are broadly ready. Fit trekkers do not escape altitude, and those who arrive over-trained and push too hard are often the first to feel it.
Is a guide required for the Everest Base Camp trek, or can I go alone?
A guide is required for foreign trekkers on this route under current rules, so going completely alone is not an option for most visitors. The requirement is largely a safety measure at altitude. Check the current rule before booking, since the regulation and its enforcement can change.
How long does the Everest Base Camp trek take for a first-timer?
Most guided itineraries take twelve to fourteen days from Kathmandu to base camp and back, including acclimatization days. Faster schedules exist but leave less room for altitude. A first-timer should choose the longer version and add a buffer day for the Lukla flight at each end.
What is the biggest risk for beginners on the EBC trek, fitness or altitude?
Altitude, by a wide margin. Fitness sets how pleasant the days feel, but altitude is what sends people down and ends treks. Build rest days into the plan, watch for symptoms, and treat descending as a normal decision rather than a failure.
Can children or older trekkers do the Everest Base Camp trek as beginners?
Many can, and the trek suits a wide age range when it is paced patiently. The deciding factors are health, a slow itinerary and honest monitoring of altitude symptoms, not age on its own. Anyone with a heart or lung condition should take medical advice before booking.